Blinky-Lite Instrumentation
Analog signal acquisition
A wireless, two-channel, high-speed analog acquisition for connecting 0–10 V sensors.
Overview
The Blinky ADC Cube is a compact, wireless instrumentation module in the Blinky-Lite Instrumentation Platform. It is designed to acquire two 0–10 V analog signals close to the equipment or sensors being monitored, then communicate scaled measurements and alarms to a central Blinky-Lite control system.
Built around the Raspberry Pi Pico W / RP2040, the module uses 2.4 GHz Wi-Fi and MQTT publish/subscribe communication. This event-driven approach supports distributed deployments without wired data connections and enables Blinky-Lite to use device information for recording, notifications, visualisation, and machine-protection workflows.
| Enclosure | PCB |
|---|---|
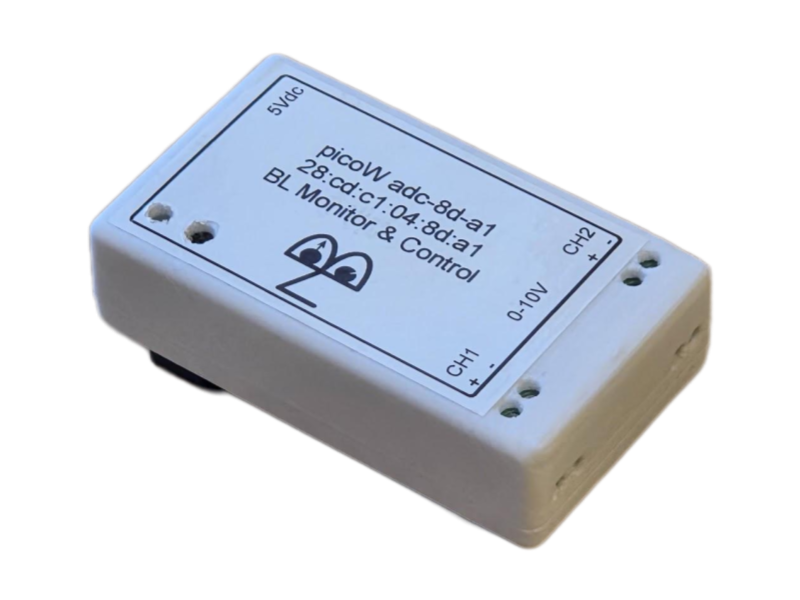 |
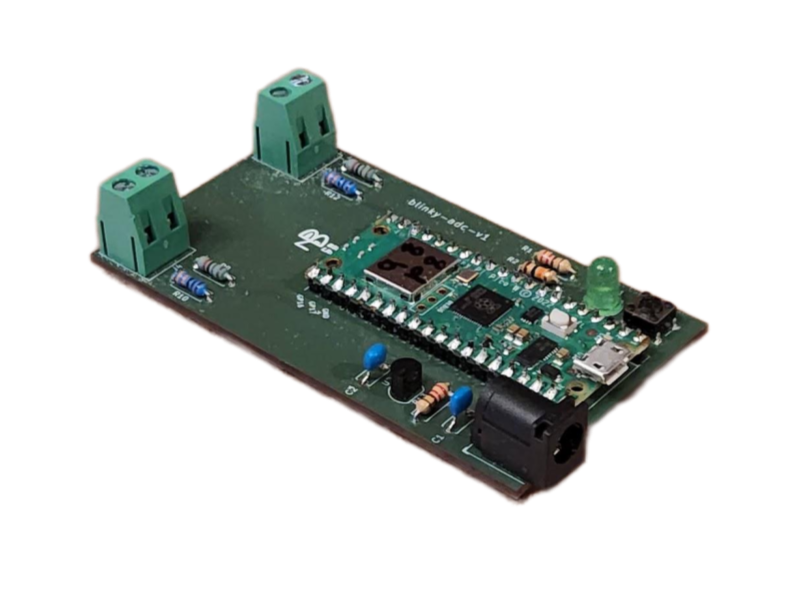 |
Key features
- Two-channel analog acquisition: Read two independent 0–10 V analog signals.
- PLC-style field wiring: 5 mm screw terminals make it straightforward to connect analog signals in a PLC-like installation environment.
- High-speed sampling: Acquire each channel at speeds above 200 kS/s.
- 12-bit resolution: 2.5 mV input sensitivity across the 0–10 V range.
- Programmable digital filtering: Adjust each channel’s measurement bandwidth from 0.1 Hz to 100 kHz.
- Engineering-unit scaling: Configure output scaling in Blinky-Lite so sensors can be viewed and used in their natural units.
- Wireless connectivity: 2.4 GHz Wi-Fi for remote or distributed installations.
- Event-driven integration: MQTT publish/subscribe communication with Blinky-Lite.
- Open-source firmware: Microcontroller code can be adapted for site-specific instrumentation and integration requirements.
Typical applications
- Reading analog sensor outputs in engineering units
- High-speed monitoring of voltage-based instrumentation signals
- Accelerator, laboratory, and industrial test systems
- Distributed sensor installations requiring central visibility and configurable filtering
- Alarm and machine-protection workflows based on analog process values
Specifications
- Product Code
- adc-cube
- Primary function
- Analog signal acquisition and scaling
- Sensor / interface
- Two 0–10 V analog input channels
- Channels
- Two analog-to-digital converter channels
- Measurement / operating range
- 0–10 V per channel
- Resolution
- 12 bits; 2.5 mV sensitivity
- Sampling rate
- Over 200 kS/s per channel
- Digital filter bandwidth
- Programmable from 0.1 Hz to 100 kHz per channel
- Inputs / outputs
- Two analog voltage inputs with 5mm screw terminals
- Power input
- 5 V DC via 2.1 mm barrel male connector
- Wireless
- 2.4 GHz Wi-Fi
- Communication
- MQTT publish/subscribe protocol
- Controller
- Raspberry Pi Pico W / RP2040
- PCB dimensions
- 48 mm × 86 mm |
- Enclosure and mounting
- 53 mm × 93 mm × 25 mm; DIN Mod3-compatible enclosure with removable DIN-rail mount
- Platform
- Blinky-Lite Instrumentation Platform
Getting started
Hardware
- Install the Blinky ADC Cube close to the sensors or analog signals to be monitored.
- Connect each 0–10 V signal to its assigned 5 mm screw terminal according to the product wiring labels, providing straightforward field wiring in a PLC-like installation environment.
- Verify that all input voltages remain within the supported 0–10 V range.
- Power the device from a regulated 5 V DC supply through the 2.1 mm barrel connector
- Mount the enclosure on a DIN rail when required, or remove the DIN-rail mount for an alternative installation.
Firmware build target
The firmware targets the Raspberry Pi Pico W / RP2040 using the Arduino-Pico board support.
- Board: Pico W / RP2040-compatible target
- Flash layout: Sketch 1920 KB, filesystem 128 KB
- FQBN flash option: flash=2097152_131072
Open-source software and licensing
The firmware is released under the MIT License, giving users broad permission to study, modify, and adapt the code for their own applications. The open hardware design can likewise be customized to suit site-specific requirements. The firmware uses the open-source Arduino-BlinkyPicoW library, which is also available under the MIT License.
Configuration
- Build and upload the firmware using the project’s source and configuration files.
- Use the onboard web interface to set or update Wi-Fi credentials.
- Configure the MQTT connection and create the corresponding device integration in Blinky-Lite.
- Set channel scaling so each input is reported in the sensor’s required engineering units.
- Set the digital filter bandwidth, alarm thresholds, and any required operating limits for each channel.
- Verify that normal measurements and alarm events appear as expected in Blinky-Lite.
Integration model
The Blinky ADC Cube uses MQTT to publish scaled measurements and alarm events. This event-driven model avoids conventional polling and enables prompt control-system responses to changing analog conditions.
In a typical deployment, the device connects by Wi-Fi to the network and communicates through an MQTT broker. Blinky-Lite represents it as an integrated instrumentation node and can use its information for recording, display, notification, alarms, and machine-protection logic.
Measurement, safety, and installation considerations
- Confirm that connected sensor outputs, signals, and environmental conditions are within the product’s specified limits.
- Do not apply voltages outside the supported 0–10 V input range.
- Apply channel scaling and digital filter bandwidths appropriate to the sensor and required measurement response.
- Validate normal operation and alarm behavior against a known reference source before relying on the device for operational or protection decisions.
- Review connector, cable, grounding, shielding, enclosure, and environmental requirements before installation.